Utilizing Different Methods to Remove Logic in Primavera P6
There are multiple ways to remove logic from a P6 schedule. Below are four examples of how this can be accomplished.
Method #1 – Using the Relationships tab
- Select the Relationships tab.
- Select the Activity that needs to have a relationship removed.
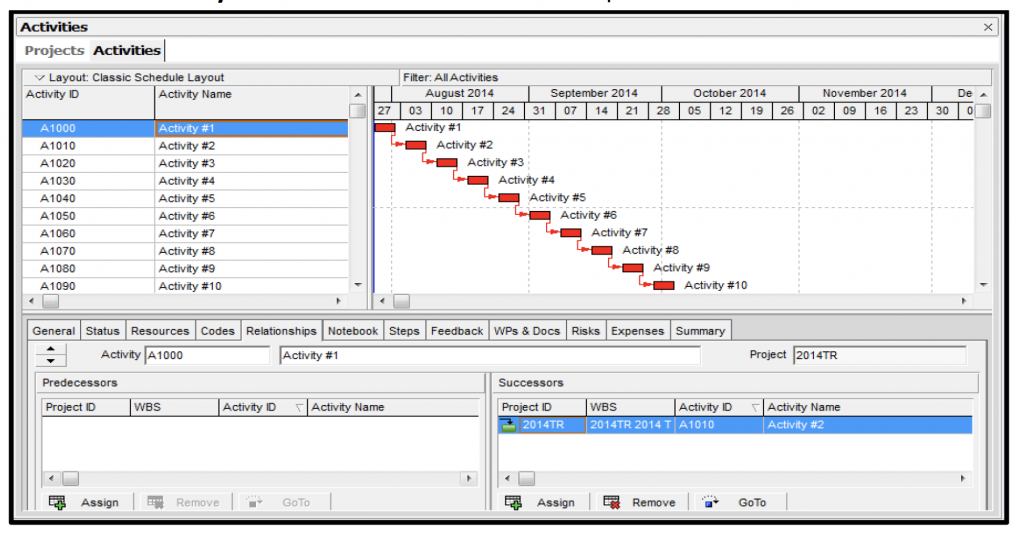
- In the Successor box, select the Successor to be removed – Click Remove – This will remove the relationship between the two activities.
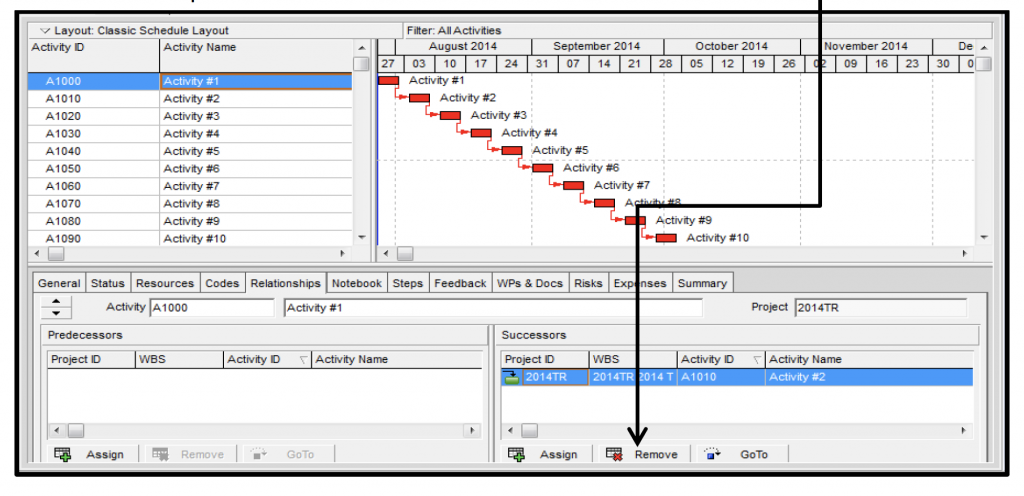
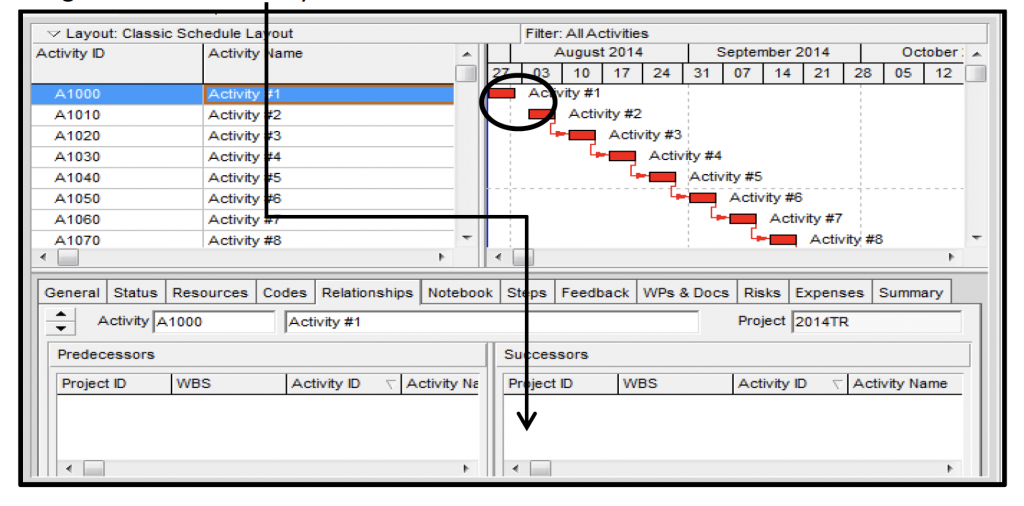
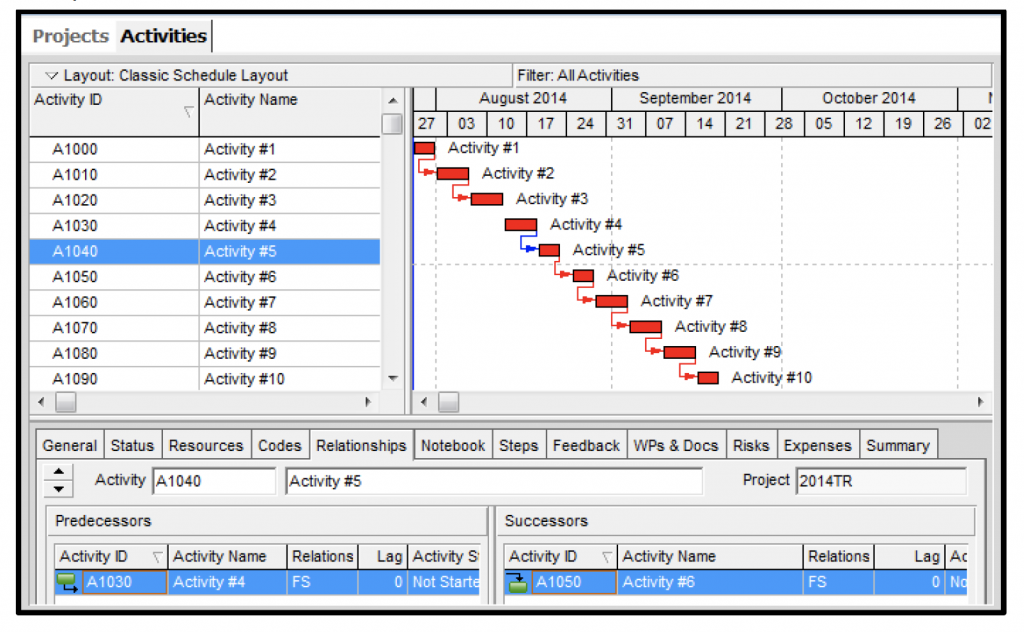
4. Logic has been removed. The relationship line between Activity #1 and Activity #2 is no longer there and Activity #2 has been removed from the Successor box.
Method #2 – Using the cursor and delete key on your keyboard
- Move the cursor under the applicable relationship line until a white arrow appears.
- Left click once and the relationship line will turn blue.
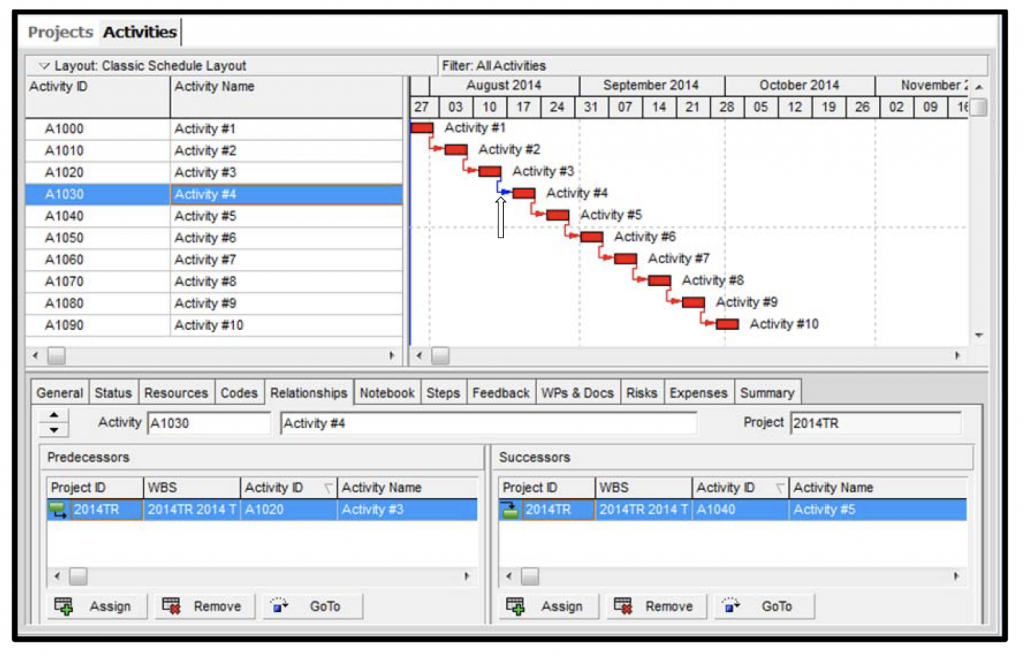
- Press Delete and then Enter on the keyboard and it will remove the relationship between the two activities.
- By continuing to press Delete and Enter the cursor will move down to the next relationship.
Method #3 – Using Trace Logic Network
- This method uses the Trace Logic Network
- Click the Trace Logic Network button
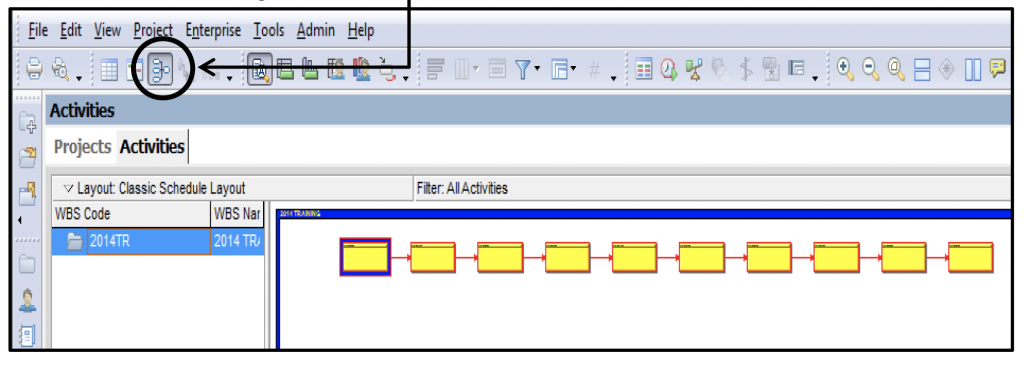
- Click the red relationship line between the activities.
- The relationship line will turn blue.

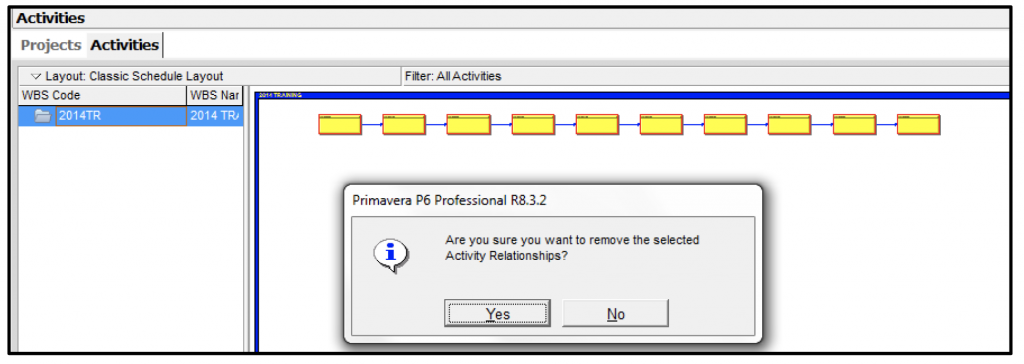
- Select the Ctrl Key and continue to hold down, drag a box around all the activities you want to remove logic from. All the relationship lines will turn blue.

6. Press the delete key. Click “Yes” to remove the relationships between the activities.
Method #4 – Using Successor button
1. Select all the activities

2. Click the Successor button on the right side toolbar
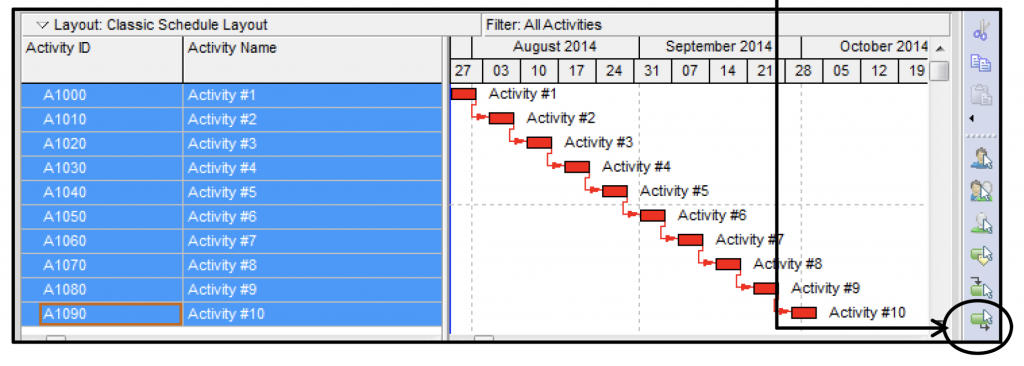
Utilizing Different Methods to Remove Logic in PrimaveraTM P6
- Highlight all the activities and click

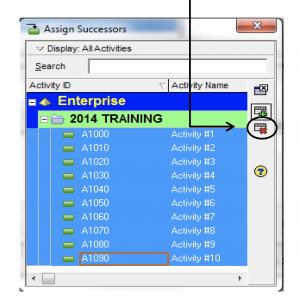
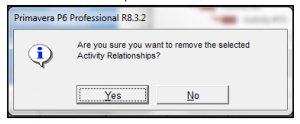
4. Click “Yes” to remove the relationships between the activities.
5. Close the Assign Successors dialogue box.
Congratulations you have successfully completed four methods for removing logic.

